How do I change the featured resources within the “In the Spotlight” area?
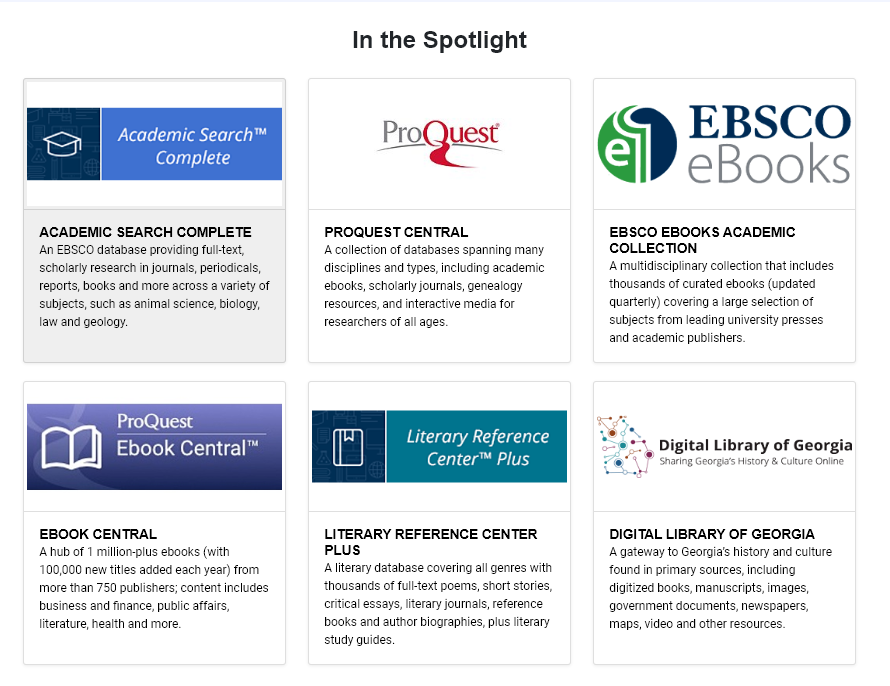
The GALILEO Search “In the Spotlight” area allows you to feature six resources on the GALILEO homepage. GALILEO staff have selected resources for each community to serve as defaults. If you’d like to customize the resources that appear in this area, you can do so using GALILEO Admin.
Featured resources can be resources provided by GALILEO or local resources set up in GLRI (GALILEO Local Resource Integration). They also can be used to highlight your library or school events, such as summer reading programs.
Please note: At this time, featured resources cannot be used for adding widgets to GALILEO’s homepage spotlight area, as they will not accept HTML or JavaScript code.
Follow the steps below to add a custom featured resource in GALILEO Admin:
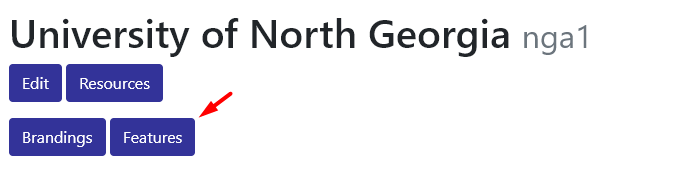
- Select the “Features” button in the top-left corner of your institution’s record.
- Select the “New” button located in the top-left of the features area.
- This will open a blank form that can be used to create your custom featured resource.
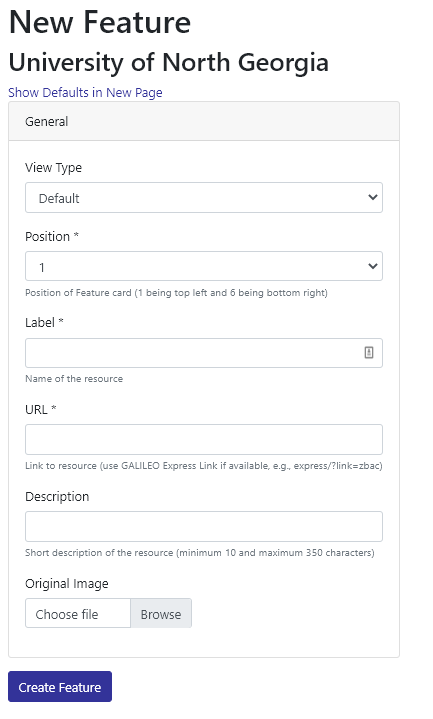
View Type
For K-12 and public library GALILEO Admin users, you can add different featured resources to each of the GALILEO views.
NOTE: K-12 and public library institutions should only add local resources that are available throughout their school district or library system.
You will be able to select the school view in which you would like the featured resource to appear. You will see options for elementary school, middle school, high school, and educator. Generally, for those outside of K-12 schools and public libraries, the default view will be the only view type available.
Position
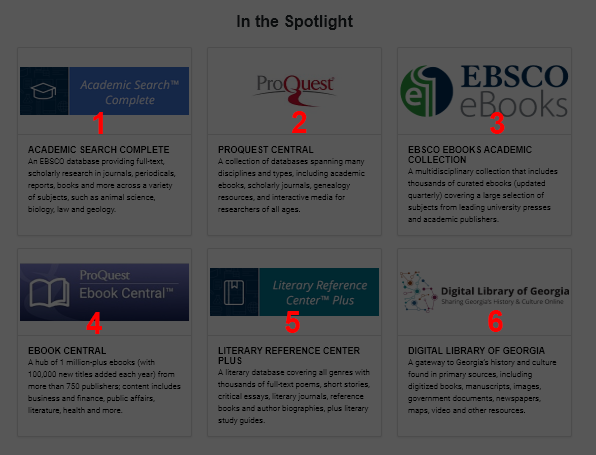
Select the position number where you’d like the featured resource to appear. Positions are numbered 1 to 6, with 1 located at the top left and 6 located at the bottom right.
Label
The name or title of the featured resource.
URL
The URL for accessing the featured resource. If you’re adding a GALILEO or GLRI resource, it is recommended that you use the resource’s corresponding express link (e.g.: https://www.galileo.usg.edu/express/?link=zbac)
Description
A short description of the resource. The description must be between 10 and 300 characters. If it does not meet this requirement, the featured resource will not save.
Original Image
Select an image you’d like to use with the featured resource. The image will automatically be resized to fit in the 328px by 164px area. If no image is selected, the default GALILEO featured resource image will be displayed.

In most cases, photos should be owned and approved for use by your institution. Many universities have approved images that can be used for university marketing purposes, which would include using those photos on the GALILEO portal. If you are using a photo to represent a database, vendor-approved photos are acceptable in this case. You can read the complete image guidelines here.
- Select “Create Feature.”
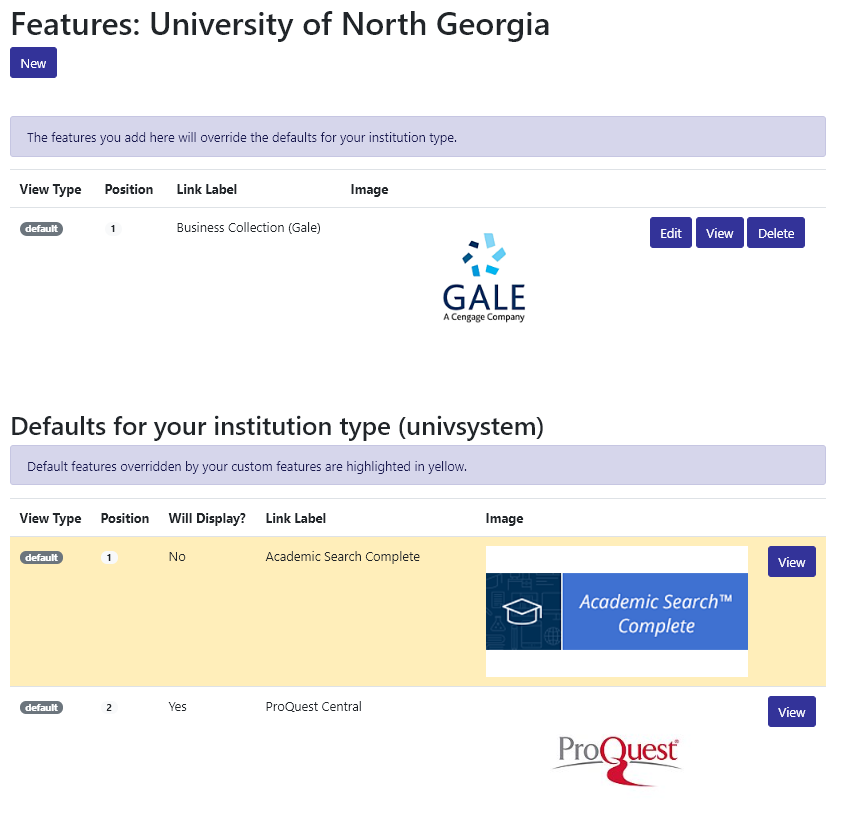
Now that you’ve added a featured resource, you will see it in the features area at the top of the page. Also note that the default resource that was overridden by your new featured resource is highlighted in yellow in the defaults for your institution type area.
If you delete a custom featured resource, the default resource in that position will be restored.
If you would like to be able to log in to GALILEO Admin and manage your featured resources, please submit a ticket to GALILEO Support to request an account and training.
Other questions in this category: Support for Librarians, GALILEO Admin
Keywords: GALILEO Admin, featured resources, in the spotlight, general user, librarian support
Last Updated: Mon, July 12, 2021 - 6:07:42